Summary
Learn how to simplify your SOLIDWORKS BOM by combining part numbers from different sources into one column for cleaner documentation.
Combining Different Part Numbers into a Single SOLIDWORKS BOM Column
With drawing sheet space at a premium, there is arguably a benefit to minimizing the number of columns in the bill of materials (BOM) table. Combining different part number sources within one BOM column can greatly aid in this effort.
Why Should You Combine Part Numbers?
Part numbers can come from a variety of places in SOLIDWORKS. The most common part number variables start from a single body part, multi-body cutlists, and standard toolbox components. Typically, these sources may be defined in different places in the SOLIDWORKS Custom Properties and may be defined slightly differently.
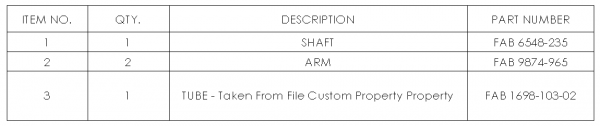
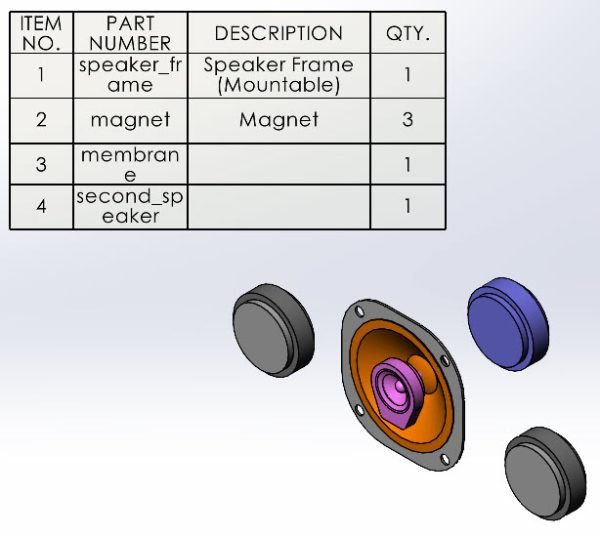 PART NUMBER column in a sample Bill of Materials
Other than saving space in a drawing, combining the part numbers in a single BOM column can help improve the clarity of your documentation. Rather than having multiple columns or additional callouts for a single property, it is all displayed neatly together.
How to Consolidate Properties in a BOM Column
The standard Table Template, when creating a new BOM table, is set up for this by default. However, if you are using a non-standard template or have created a custom template ,you will need to manually add the consolidated column.
To add a column for all part numbers:
- Add a new column to the bill of materials.
- Double-click on the column header.
- For Column type, set it to PART NUMBER.
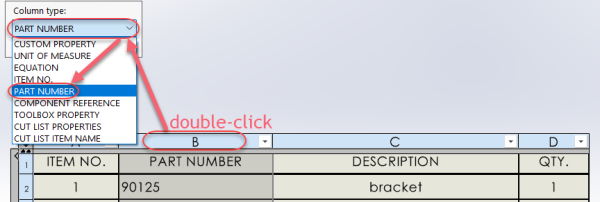
Setting the BOM column to include all part number variables
This new column will serve as a catch-all for the various part number sources we mentioned previously. Note that the PART NUMBER column type is NOT a Custom Property. In fact, CUSTOM PROPERTY is a different selectable, useful in other situations, but for this exercise is not what we need.
Part Numbers for Single-body Parts
For parts, the PART NUMBER column will pull the data directly from the file name.
This is where maintaining best practices for part numbering systems comes in. In this instance, you would want to ensure that every file name is unique so each value in that column will appear on its own and not have a duplicate. Implementing SOLIDWORKS PDM can help enforce proper practices by disallowing duplicate file names and automatically generating names based on a customized format.
Even if you do manage to keep same-named files in separate Windows folders, it’s asking for trouble, especially if you try to open more than one top-level assembly simultaneously, where they include dissimilar parts that are same-named “bracket.sldprt”. Follow best practices and put descriptions like “bracket” and “o-ring” where they belong: in the custom property called Description.
Part Numbers Multibody Cut List items
In case of a part containing multiple bodies, where each body has its own part number, a Cut List is created automatically. This includes anything where the multibody part was a weldment, an arrangement of pieces of sheet metal, or another collection of bodies. Each item in the Cut List has its own properties.
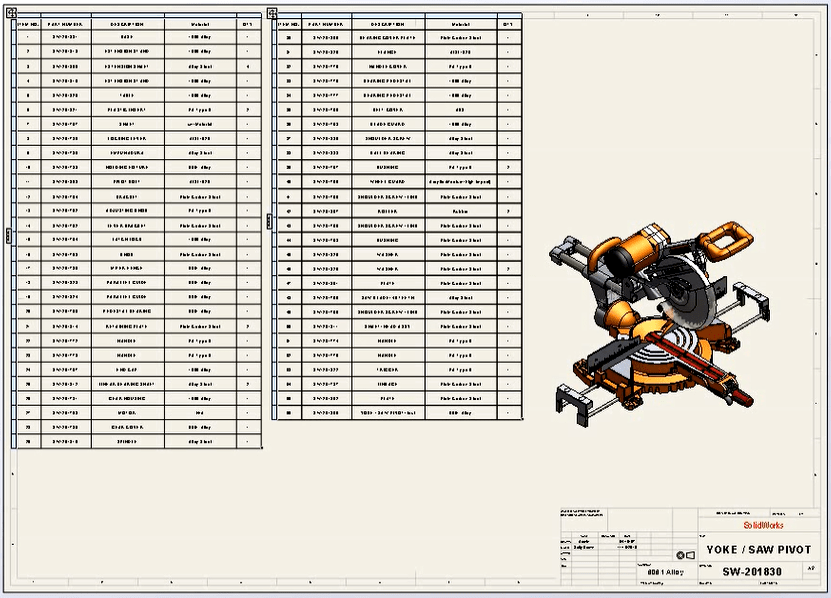
 A SOLIDWORKS BOM created from a cut list
To set up part numbers for multibody parts:
- Create a Cut List property called Part Number or PART NUMBER. This is not a case-sensitive field.
- For each body, assign a value to the custom property created in the previous step.
- Inspect the results in the assembly BOM table. The value assigned in the previous step should now appear in the PART NUMBER column in the table.
When the assembly contains a combination of single-body and multibody components, we may need to experiment with BOM table settings to ensure that every part number appears in its own row. Depending on which BOM type is chosen when creating the table, the multibody properties may appear differently. For example, the Flattened type will show the multibody part info as well as the single-body part info, but some rows may need to be hidden.
Part Numbers for Toolbox Parts and Other Fasteners
For SOLIDWORKS Toolbox parts and fasteners, the part number is stored in the Part Number custom property. However, this field must be populated by the user before it will show anything in the BOM table.
To add part numbers to the SOLIDWORKS Toolbox:
- Open the SOLIDWORKS Toolbox Utilities from SOLIDWORKS
 Opening the SOLIDWORKS Toolbox Utilities
- Browse to the fastener and size you want to edit.
- Populate the Part Number field for that size.
- In the SOLIDWORKS assembly, right-click on the Toolbox fastener, Edit Toolbox Components, and hit OK > Edit Toolbox Components > OK. This will refresh the information from the SOLIDWORKS Toolbox library and update the part number.
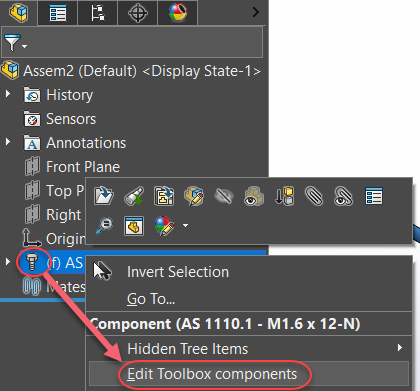 Refreshing the SOLIDWORKS Toolbox information
More Control Over the SOLIDWORKS BOM
Consolidating the various sources of part numbers is a great way to improve the clarity of your SOLIDWORKS drawings. With a few quick changes to how you design your models, SOLIDWORKS can quickly combine part, cut list, and Toolbox properties into a single SOLIDWORKS BOM column.
There are times when you need further control of the bill of materials to include non-CAD items, introduce variants based on location, or quickly include purchased components that you don’t want to model. SOLIDWORKS Manage has purpose-built tools to aid in the creation of enhanced BOMs to improve upon the standard engineering SOLIDWORKS BOM.