Summary
Learn how to modify your SOLIDWORKS installation step by step. Serial number, license type and components explained.
Modifying your standalone SOLIDWORKS installation is a necessary step to add additional serial numbers, switch serial numbers, or modify which SOLIDWORKS programs are installed on your system. SOLIDWORKS provides a quick and easy method to modify serial numbers or to choose which programs are installed right in the Installation Manager without requiring the software to be uninstalled or any manual changes to the Windows Registry.
- Switching or adding additional serial numbers
- Changing from a standalone license to a network license type
- Received a new serial number
- Ending a software evaluation and you need to add your new serial number
- Accidentally installed the wrong serial number
- Adding additional SOLIDWORKS programs to your installation
Procedure to Modify the SOLIDWORKS Installation
If you are changing to a different standalone license serial number or switching from a standalone license to a network license, then the current license must first be deactivated by selecting Help > Licenses > Deactivate… and then follow the prompts to finish the deactivation.
Note: this step is not necessary if you are not switching standalone serial numbers or if you are switching from a network license to a standalone license type.
SOLIDWORKS License Control
For Windows 10 users, click the Windows Start icon > Settings > Apps & Features and then click Modify to launch the SOLIDWORKS Installation Manager.
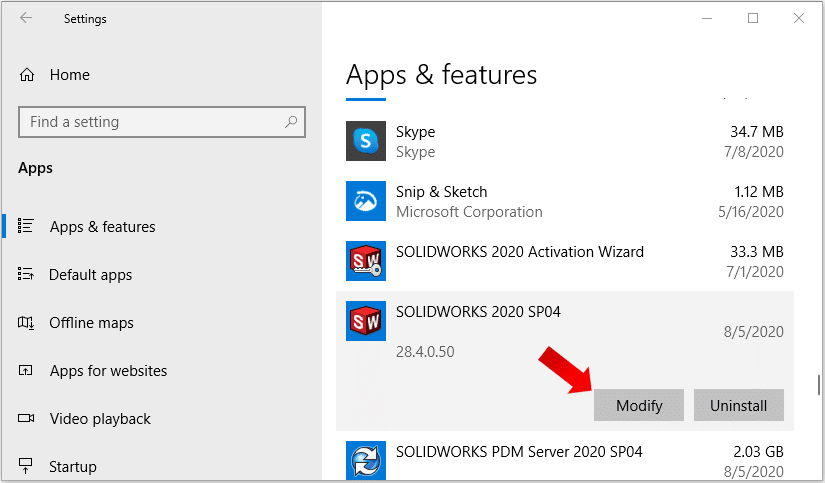
SOLIDWORKS Modify
Note: If Uninstall is the only option available, then SOLIDWORKS was installed using an Administrative Image controlled by your CAD Administrator, which requires a different procedure to be followed to modify the serial number in the Administrative Image options.
Once the SOLIDWORKS Installation Manager is launched, select the option Modify your installation and click Next.
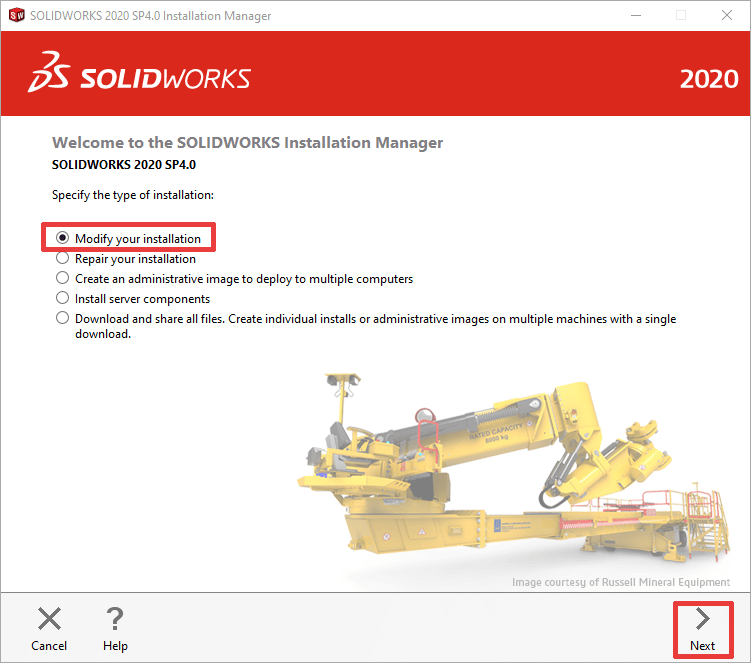
SOLIDWORKS Modify your InstallationOn the Serial Number screen, if you are changing the serial number, enter the new serial number and then click Next. If you have serial numbers for other SOLIDWORKS products, you can also change those serial numbers on this screen.
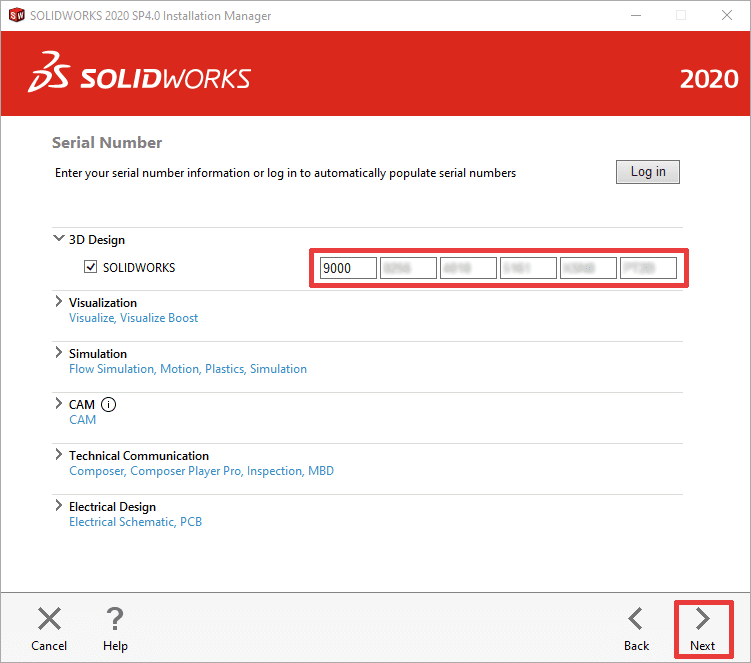
SOLIDWORKS Serial Number ScreenOn the Product selection screen, select any products to add or remove based on your serial number’s entitlement to those products and then click Next.
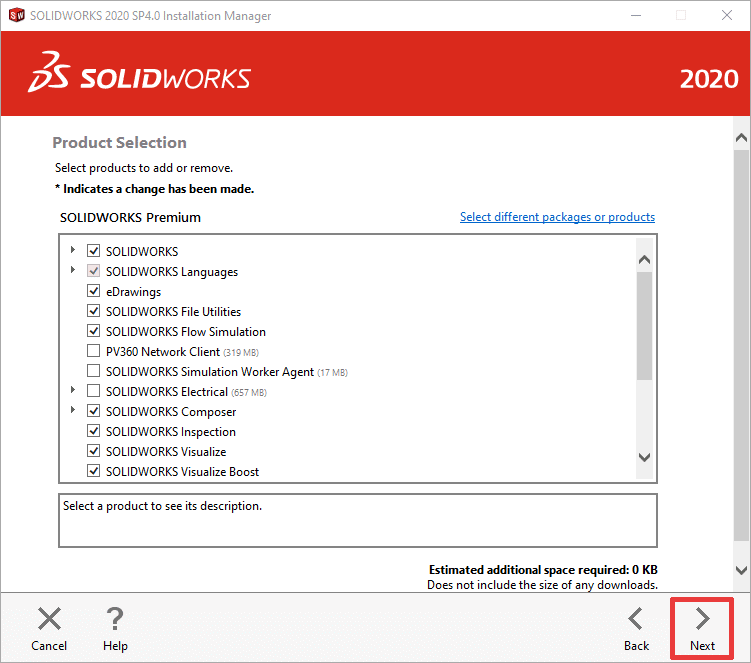
SOLIDWORKS Product Selection ScreenOn the Summary screen, review the options and check the box labeled I accept the terms of the SOLIDWORKS License Agreement and then click Modify Now to modify the installation.
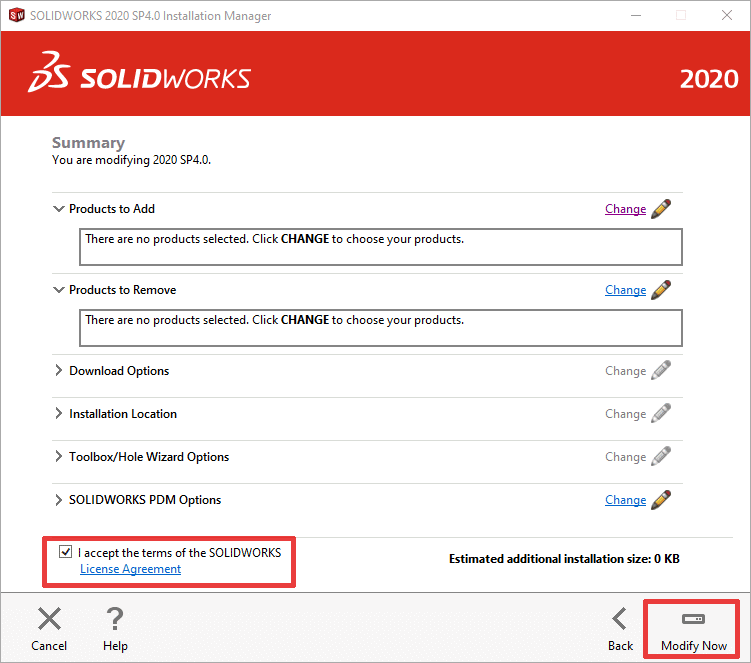
SOLIDWORKS Summary ScreenIf you don’t know how to deactivate your SOLIDWORKS license, you can read this article.