Summary
Learn how to fix SOLIDWORKS issues using the built-in repair tool before considering a full reinstall.
If you are experiencing unexpected, machine-specific behavior with SOLIDWORKS products installed using the SOLIDWORKS Installation Manager (SOLIDWORKS, PDM, Simulation, eDrawings, Inspection, Composer, Electrical…), you can use a special SOLIDWORKS repair tool to attempt repairing the installation. While a repair is not intended to target specific symptoms, it is a good broad-stroke tool to employ at first if you encounter odd behavior before considering a clean reinstall.
What is SOLIDWORKS Repair?
Built into the SOLIDWORKS Installation manager, the repair option uses the Microsoft Windows Installer to run the solidworks.msi in the background. Microsoft Windows Installer reviews everything that should be in the SOLIDWORKS installation directory and Windows Registry related to SOLIDWORKS products, comparing them to the installation media. If a problematic file is found (i.e. missing, or incorrectly registered), then the installer overwrites the file from the installation media. In comparison to a clean reinstall, a repair will maintain the user settings and user interface customization, while the reinstall will revert these back to default.
Verify Installation Files Exist
The repair function is one reason why you should not remove or relocate the files used to install SOLIDWORKS products. Prior to running the SOLIDWORKS repair, verify the installation files exist in the same location as when you installed them. The file path must be the same as when you installed for the SOLIDWORKS Installation Manager to locate the files required for the repair.
- If you installed from the DVD, verify you have DVDs available for the specific SOLIDWORKS version.
- If you installed from your local machine, the default location for these files is C:\Users\\Documents\SOLIDWORKS Downloads
- If a network location was used to install, then you need to be connected to that same network to run the repair and the file path must be the same as when you installed.
How to Run the SOLIDWORKS Repair Tool
Locate the SOLIDWORKS installed program by:
For Windows 10 users, click Windows Start icon > Settings > Apps & Features and then click Modify to launch the SOLIDWORKS Installation Manager.
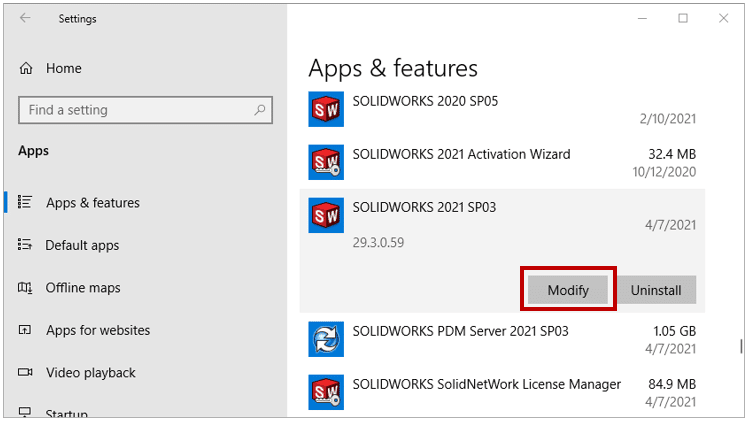 SOLIDWORKS Modify
Select the option ‘Repair your installation’ and then click Next.
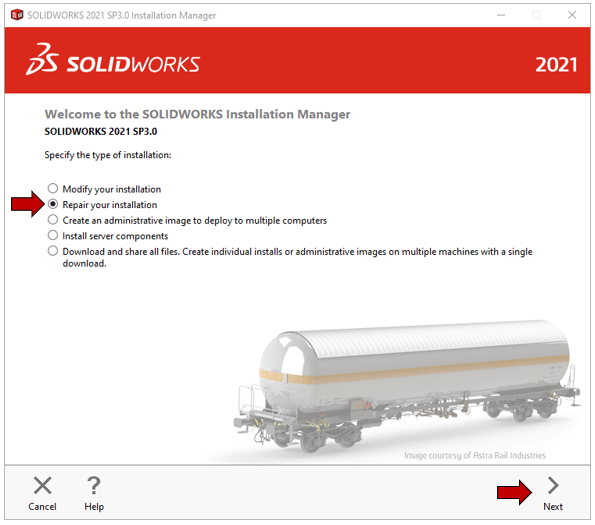 SOLIDWORKS Repair
Select the SOLIDWORKS product(s) to repair and then click Repair.
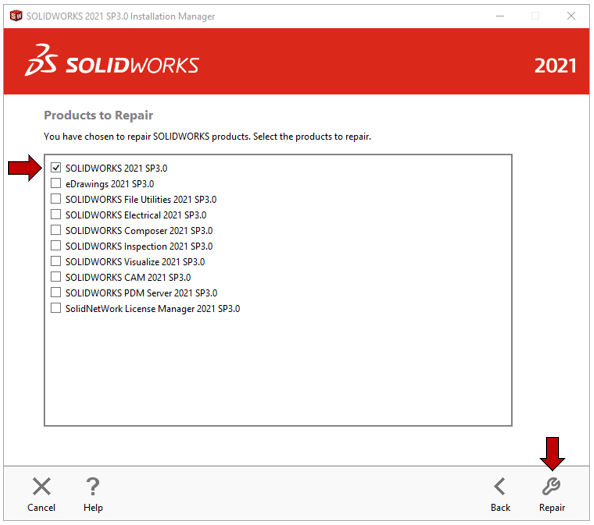 Select the SOLIDWORKS Product
The repair process time will vary depending on the product(s) selected and what needs repaired.
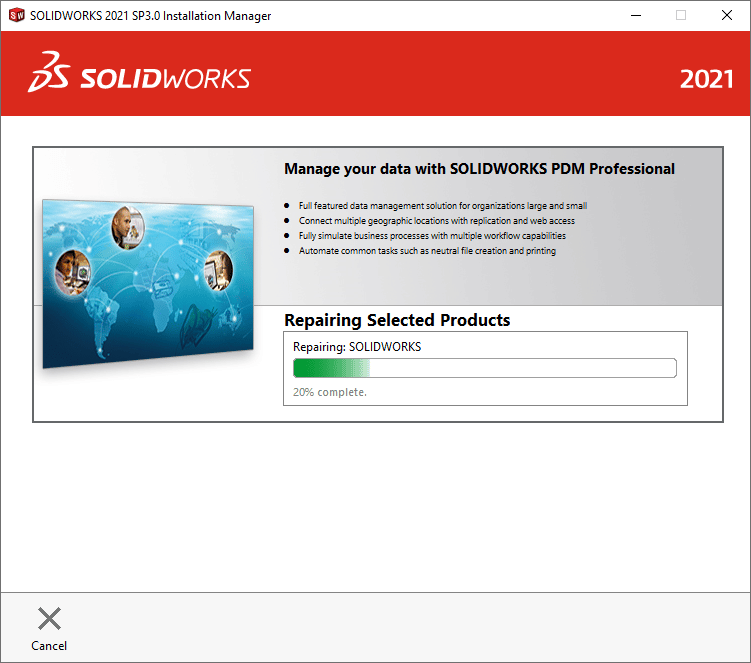 SOLIDWORKS Repairing Start
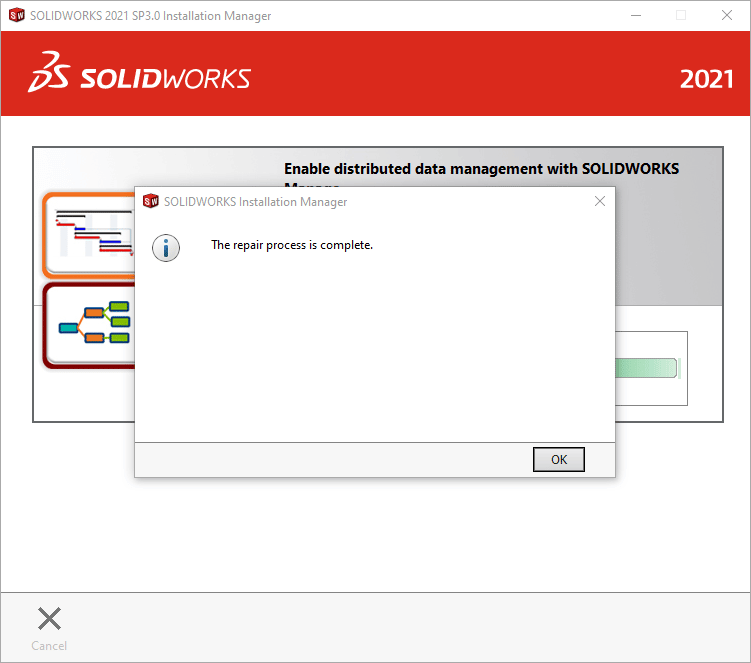 SOLIDWORKS Repair Complete
If you are having issues with "Modifying Your SOLIDWORKS Installation," you can read our article.


